How to Use Advanced Triplanar Material Function
Follow these simple steps to set up and use the Advanced Triplanar Material functions inside Unreal Engine.
This workflow ensures optimal performance and allows you to easily apply triplanar mapping to multiple textures.
Step 1: Create a New Material
Start by creating a new material in Unreal Engine. Open it in the Material Editor.
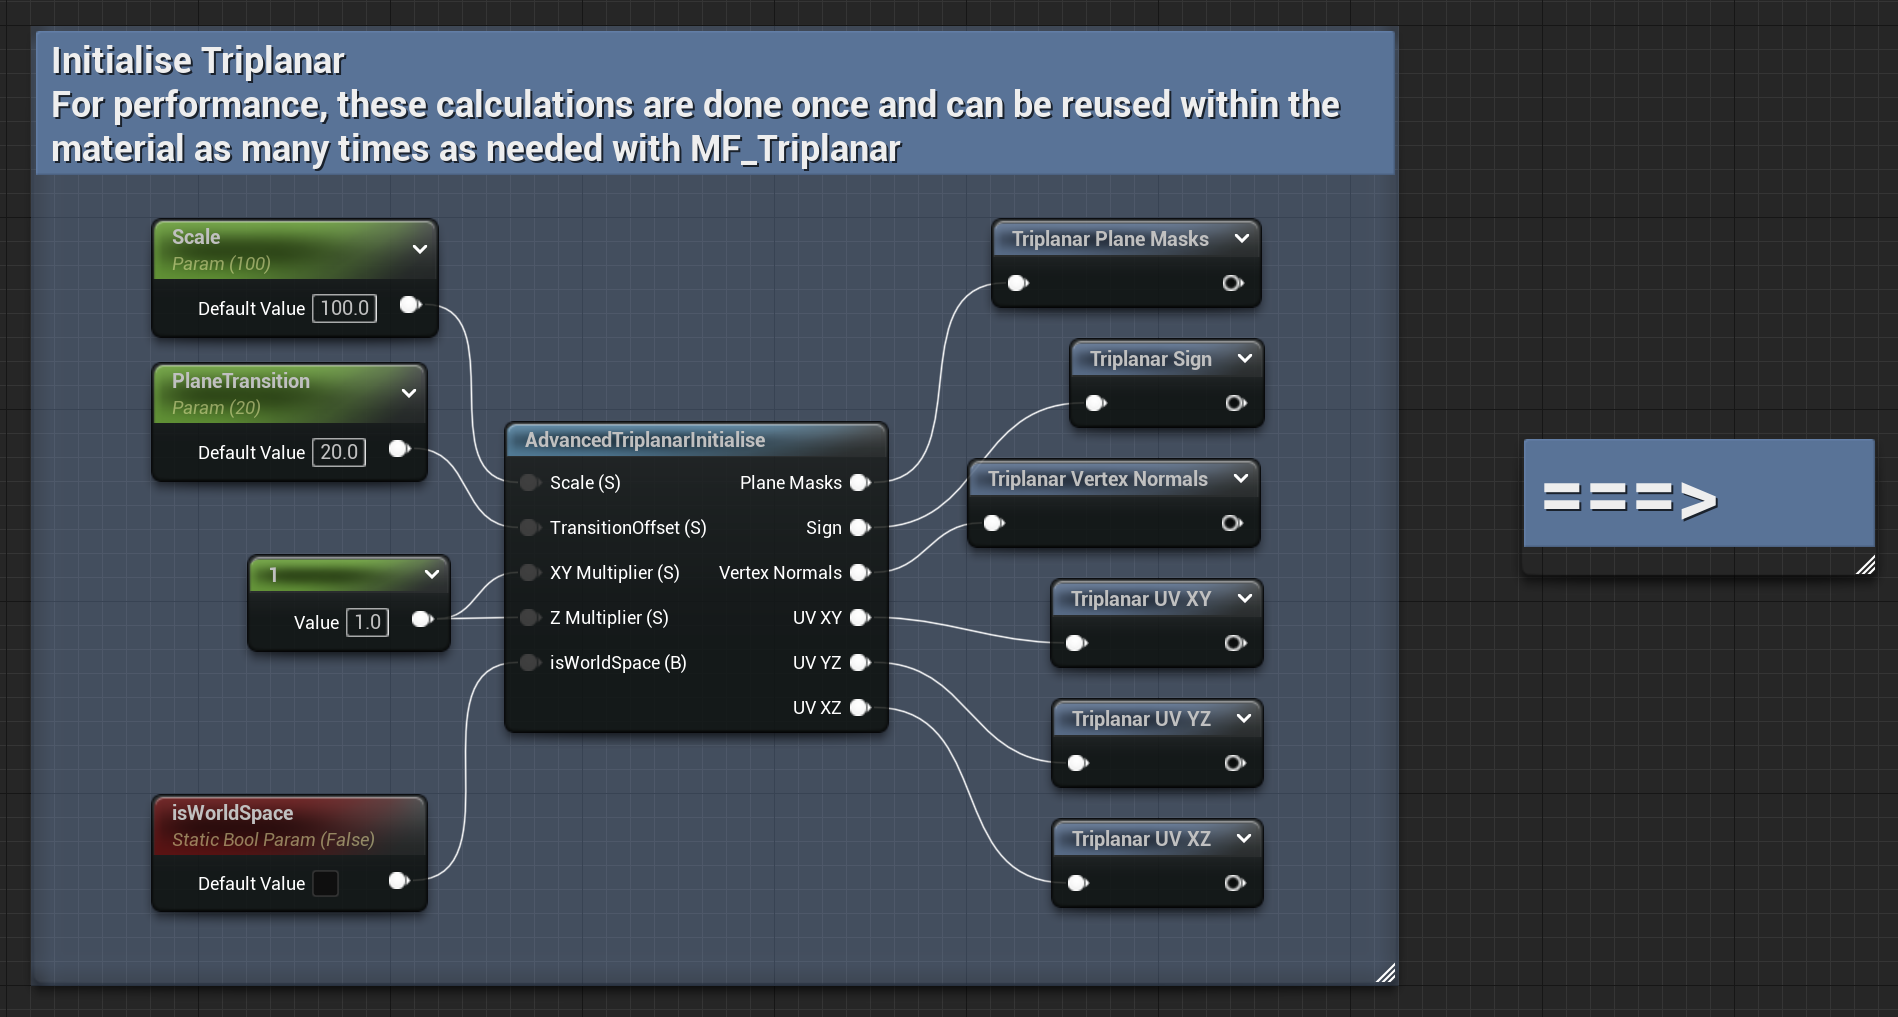
Step 2: Add AdvancedTriplanarInit
In your material graph, add the material function AdvancedTriplanarInit.
Set the parameters as needed, then create Named Reroute Nodes for each of the outputs.
This allows you to re-use the values across multiple triplanar textures in your material.
Step 3: Add AdvancedTriplanar Functions
Add the material function AdvancedTriplanar as many times as needed — once for each texture you plan to use.
Pass in the Named Reroute Nodes created earlier and connect each texture object accordingly.
In the example below, you can see both a BaseColor and a Normal texture.
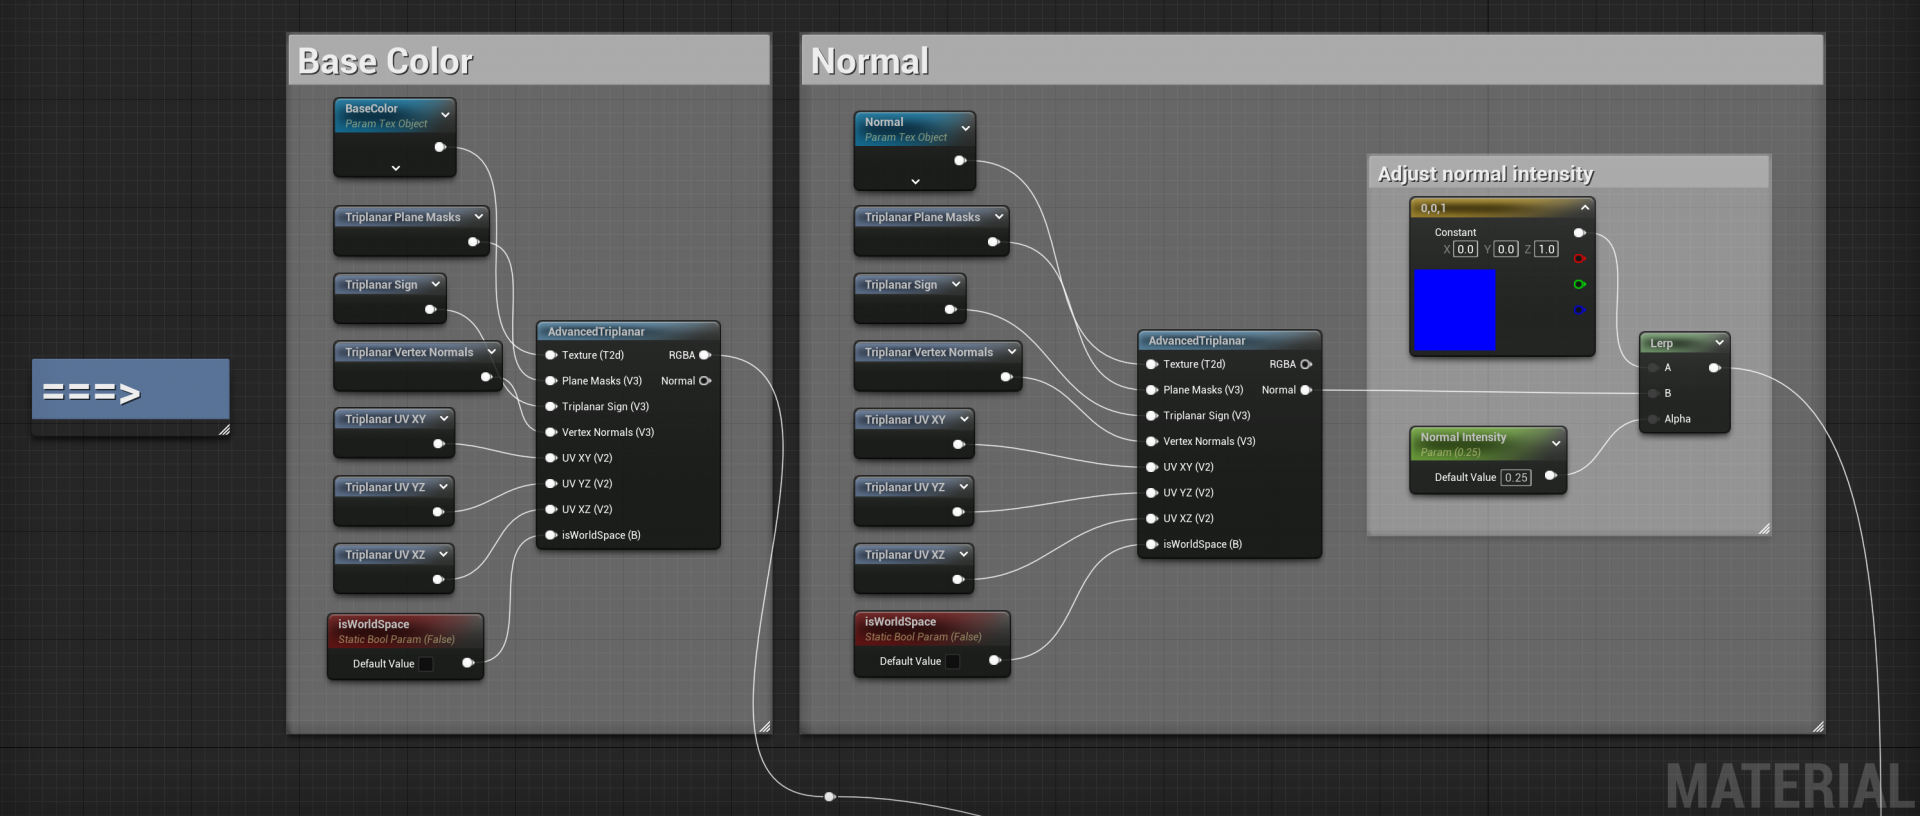
Step 4: Connect the Outputs
Connect the outputs of each AdvancedTriplanar function to their corresponding material inputs
(for example, BaseColor → BaseColor, Normal → Normal).
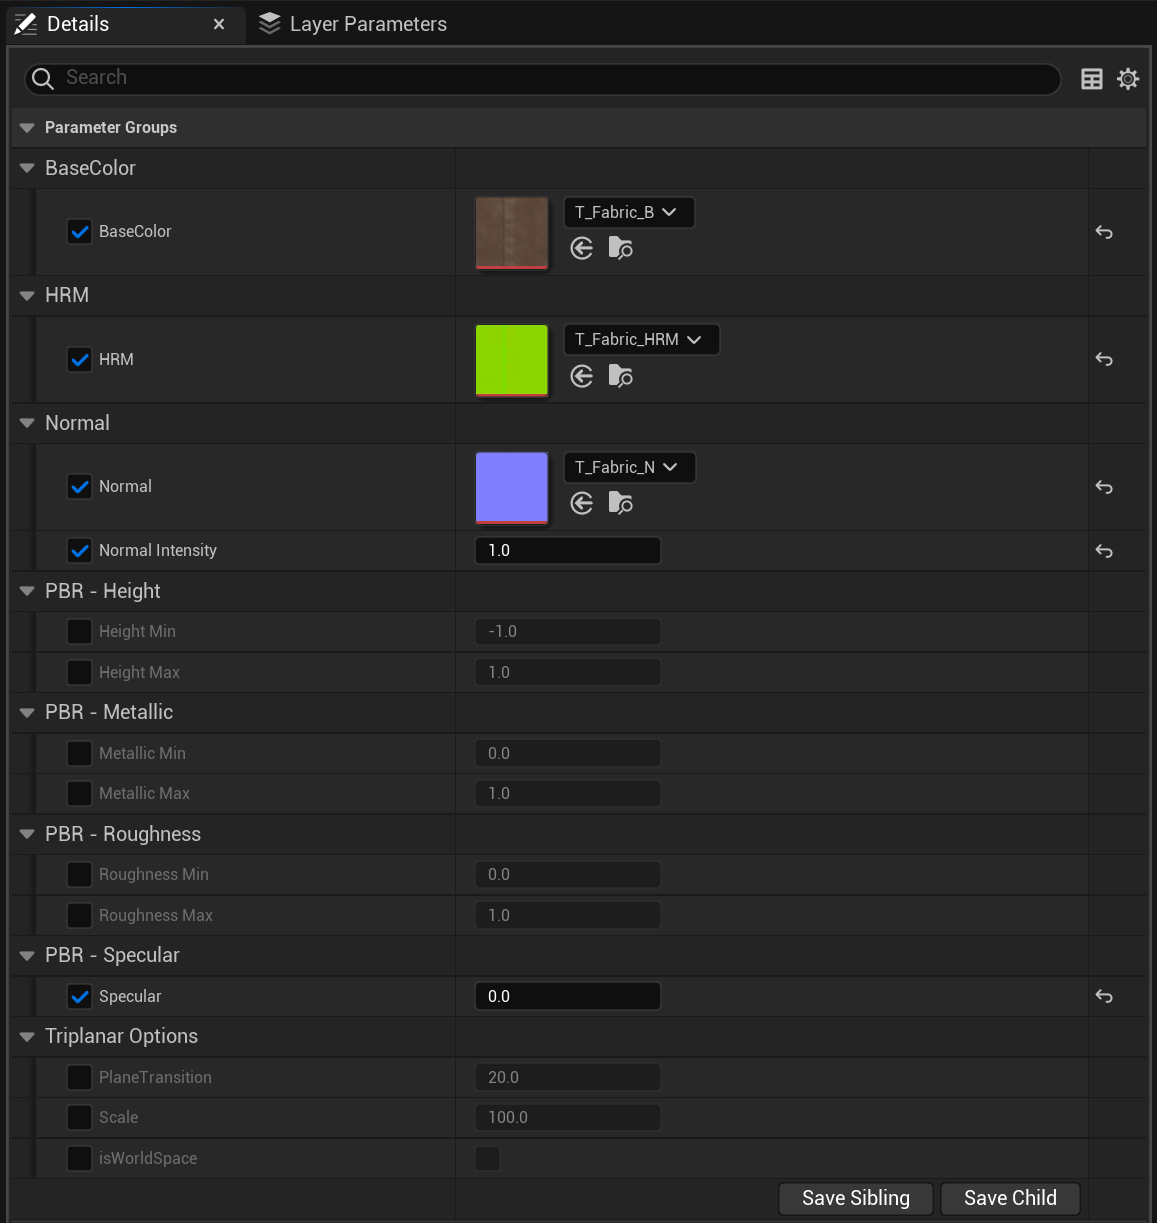
Step 5: Save and Create a Material Instance
Once your material graph is complete, Save it and create a new Material Instance.
This allows you to easily tweak settings and assign textures without recompiling the shader.
Step 6: Add Textures and Adjust Parameters
Open the material instance you just created. Add your textures into the corresponding slots, then
adjust the other parameters (such as triplanar intensity or blending) to your liking.
All Done!
That’s it! 🎉 You’ve successfully created your first material using the Advanced Triplanar Material Functions.
Enjoy seamless, accurate triplanar texturing in Unreal Engine.